|
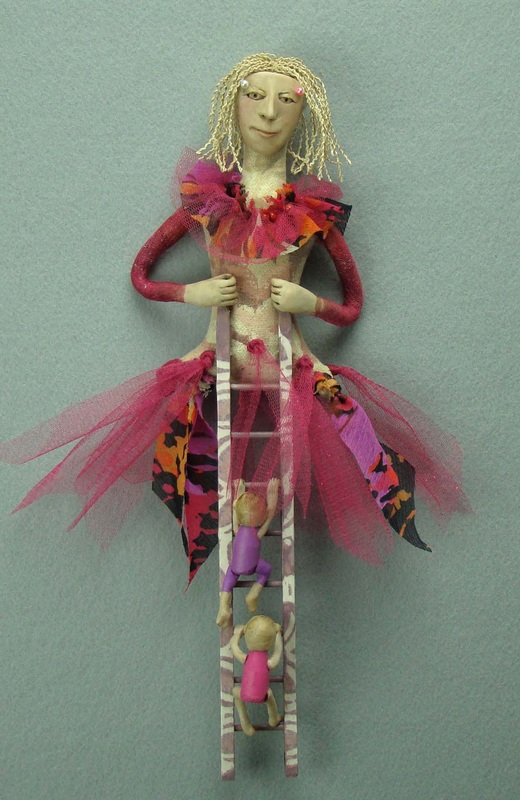
People sometimes ask where my ideas come from. I usually can't verbalize the answer, but sometimes I have clues that I can identify. So often the creation of a new piece has to do with fitting together old ideas in a different way with updated skills and new materials. The determination to problem-solve along the way to a happy ending is key. The figure pictured below is one of my new "dolls". Let me trace through my thoughts as I figured her out. The angel was one of my early doll designs. The body pattern is a very simple one that I had used often before. Now that my access to sticks and yucca seed pods is much more limited it is time to move on. I started to think about what I could substitute for legs. It seemed like a ladder would work. I have been delighted with the Native American Indian storyteller figures and thought for a while that it would be interesting to use this idea in a different type of doll. So, children climbing the ladder came to mind. You can see below how closely the little kids are related to the goofy "Twit Ornaments" I have made for several holiday seasons. After making 200+ of these guys, I realized I could modify that idea with different results. My first thought was to use sticks to make the ladder for a twiggy kind of look. No luck. If I didn't have sticks for legs, why would I have sticks for a ladder? I tried several other unsuccessful and frustrating ideas. In the end I used 1/4" square dowel with bamboo skewers for rungs. The decorative paper covering smooths over the rough ends of the rungs. The polymer clay face is similar to the Angel idea, but held in place with decorative pins instead of stitching. The hair was added after I snipped a hold in the head while trimming the end of the pin. Arms are wrapped wire with polymer hands. I had a hard time making the hands hold the ladder and will probably change this in another project.
0 Comments
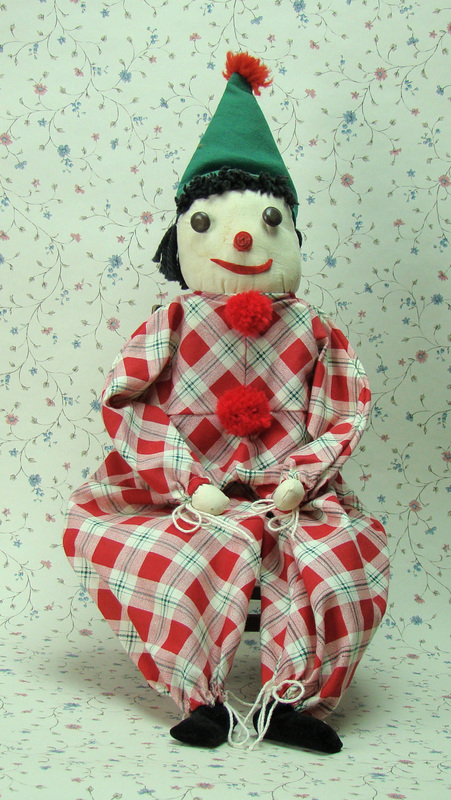
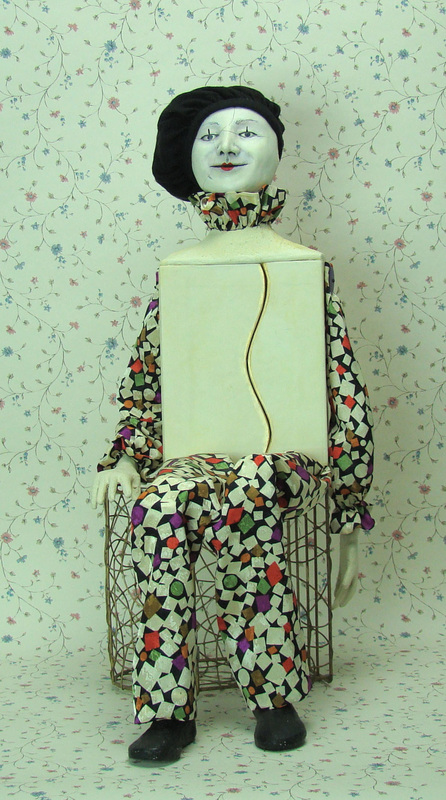
This week I have been developing two new doll ideas. ( Note: This goes against my recent resolution not to make "merchandise".) Neither one is really ready to show off here, so I thought it would be fun to post photos of some early dolls that were made long before Open Range Art Dolls began. The first doll is a clown my mom made in the 1950's. She used a 2 x 4 for the body, covering one end to make the head. He has shoe button eyes and a nose made from felt in a little roll so it sticks out. Each hand and foot is the head of an old fashioned clothes pin. Without arms and legs inside the garment, the figure sits easily. I don't remember the plaid fabric or the red pom-poms from when I was a kid, so maybe he has had a make over, too. The second doll is one I made in the mid 1990's. I had discovered the book Dollmaking, by E.J. Taylor about then. I'm sure I was inspired by the figure of a mime doll that he describes. I used mom's idea, however, substituting a box for the body, instead of a block of wood. This was one of my first attempts to use polymer clay for a face. I don't know why the face has developed serious cracks. I haven't had a problem with that in a long time. The hat made things a little easier: No ears, no hair.
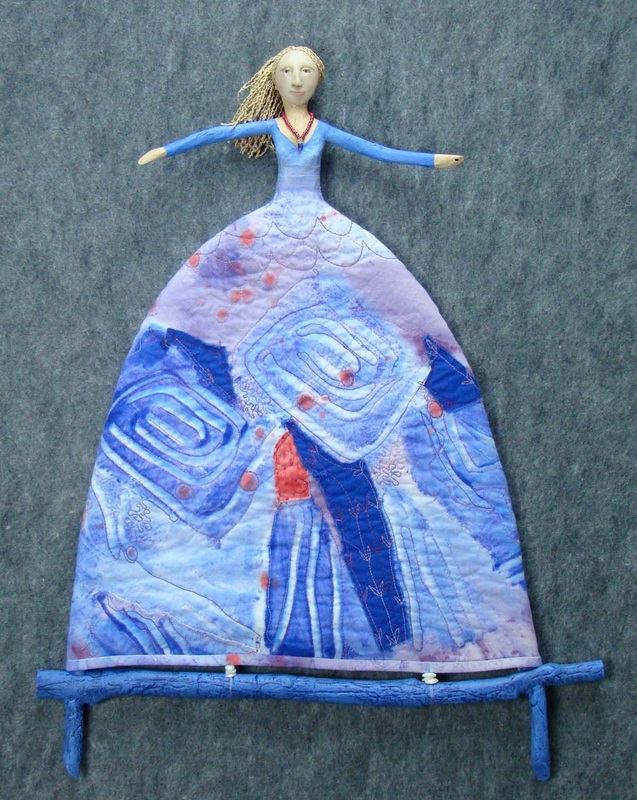
This week I unpacked some dolls I made a few years ago and found Elaine. It was easy to see that she needed work. Her face seemed a little too big and her smile a bit ghoulish. The shape of her skirt didn't really suit me and the color scheme was kind of a harsh yellow-green. I started to take her apart and it didn't take much work. The glue had dried up in several spots and without too much effort her skirt was detached. The sticks at the hem of the skirt has become brittle and very soon the finials broke off, one crumbling away. Did I say I removed her face? So, this was a lot like starting over, except that I had the body with the stick arms still intact and some fiber still firmly attached to the head. I was encouraged throughout this process to realize how much my design and craftsmanship has improved in the past 5 years. I now build a double wire armature to create the the skirt shape instead of using a single coat hanger wire. This is much more sturdy, especially where it attaches to the body of the figure. I now wrap the wires with cotton batting so that I can sew the skirt to the frame to create a smooth transition without so much glue. Last year I started treating all my found wood with several coats of gesso to make a more stable surface under the paint. I've tried every type of glue to finally find a couple of things that work very dependably. I also have a new method of making the head and attaching the face which I could not use in this makeover. Elaine has a new skirt, too. I painted this one in a series of monotype prints working into damp fabric, and then embellished it with free motion machine quilting and bits of commercially dyed fabrics. With a new skirt she need a new shirt color, and then a new necklace. Is Elaine still Elaine? I think so. Elaine before her Make Over
As I got caught up in doll making over the past 5 years or so my focus zoomed in on a making a small face. And, as I worked with polymer clay the faces become very small - often no more than 1" across. Detailed modeling is possible in polymer clay. My favorite modeling tools to achieve this are a #1 aluminum knitting needle, a round wooden toothpick, the tip of an knife blade and my little finger nail. The fingers on the hands you see at top of this page are about a half an inch long. It has been in the back of my mind for awhile now to try my hand at ceramic clay. I love it! This clay gives me the opportunity to work on a larger scale, but I struggle to do it! Think BIG. Some heads have been a little larger than others. Finally, this head is about 8" tall. Nothing ever gets any larger in the firing process. In fact, this is likely to be about 20% smaller in the end. Also, I am discovering how much the small polymer projects have conditioned me to fuss over every possible detail and surface. I'm going to try to loosen up on that tendency as I work with ceramics clay.
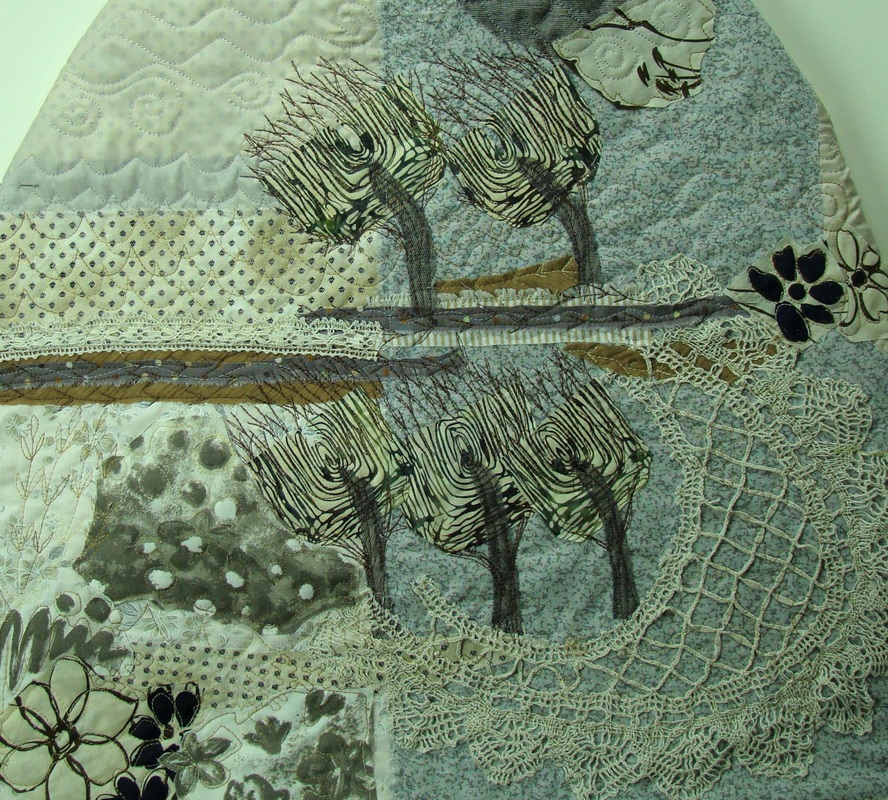
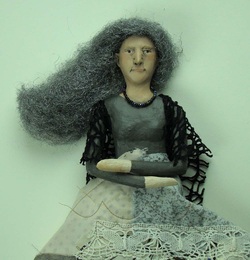 Miss Winter A series of 12 seasonal pieces has been in the planning stages for awhile and I had created the first 3 figures and frames for Large Hoop Skirt dolls. So, I was prepared when our miserable winter weather kicked in this week. The first woman in the series expresses a bitter, server, unforgiving winter day. I am still working out some refinements in the figure. I love the hank of steel wool hair caught by the wind, but it may need to me modified. I know it will need to be attached to her head! I am playing with the idea of a shawl, but it needs to be more substantial than this scrap of lace. My approach to the skirt design was much more literal than usual, but still quite abstract. I am thinking here of trees bending in the wind, a dark overcast sky, just a skiff of dirty snow left on the ground, dead plants in the garden. And did I say WIND? Looking at the photograph now I can see a few spots where I will make a adjustments before I wash the quilted skirt to fray the collage and then mount it on the frame. Then I'll move on the think about a beautiful winter day.
|
Archives
March 2022
Categories |




 RSS Feed
