|
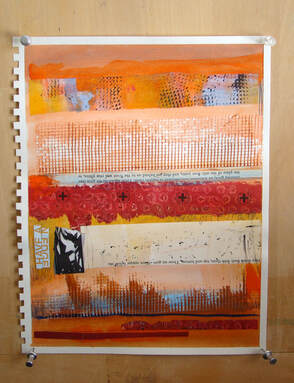
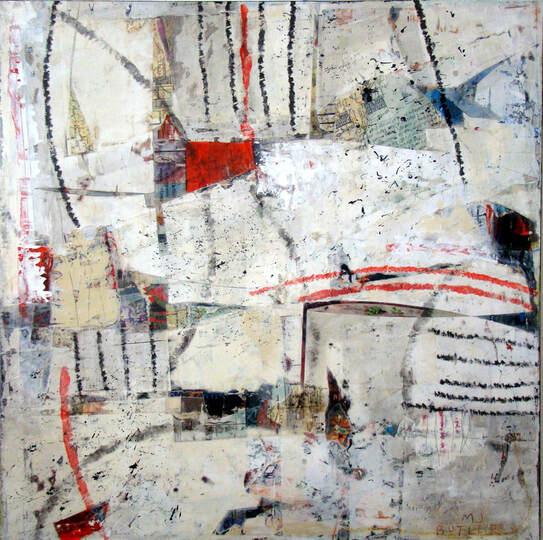
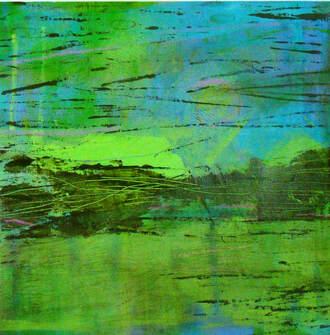
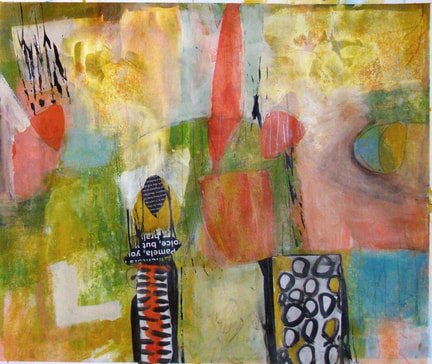
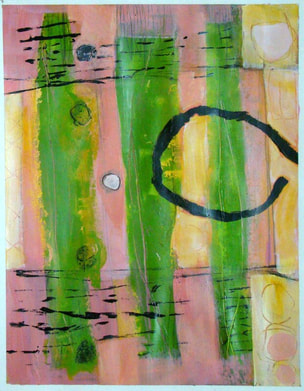
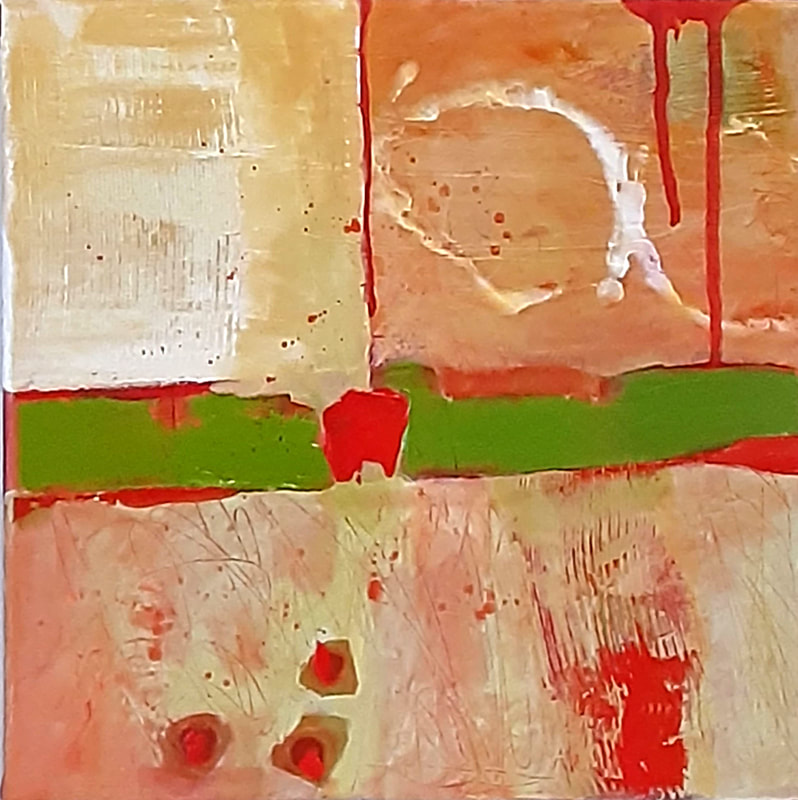
This box is my entry in the current exhibit at the Spanish Peaks Arts Center Gallery, "Outside the Box". It will be on view there until April 9. (Thurs - Sat., 11 - 2) This started out as a painting on paper. I cut and laminated it onto the outside and inside of a wooden box using acrylic gel medium. This gave me the opportunity to edit and reconstruct the painting. In the end I needed to use the every scrap to cover the whole box. The idea behind the exhibit theme was to challenge artists to try something different. This exhibit title helped me realize that the big Doll Box where I have been stuck for some time is one I made for myself. I jumped right in and didn't come out. It is an interesting little world in here, and I often have a really great experience and create cool dolls. But, is there something outside this box that I should explore? Can I jump back out? Yes, I can let myself out of my doll box part of the time. My interest in painting was rekindled a few years ago after dismissing the idea for a long time. I figured there were plenty of mediocre painters and I didn't need to be one. Well, I am interested now and I aspire to at least reach the mediocre stage one day. I work at it almost every day and each painting session reveals something new - a composition, a color combination or texture, and refines my vision a bit more. There is a lot more to the process of becoming a painter than just painting. I get that. But it would be impossible to become a painter without painting. It's a start! So, I guess you could say that I am creating a new box for myself. I want it to be big and deep, full of resources and skills - and paintings. These are some sketchbook pages I've worked on recently. Here I am exploring line, texture and a limited palette.
0 Comments
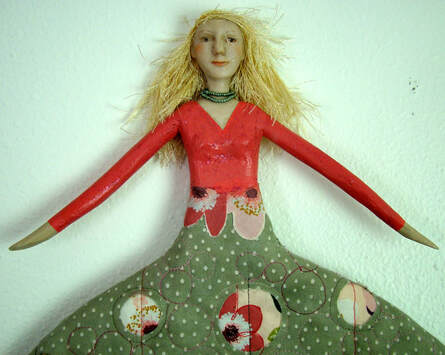
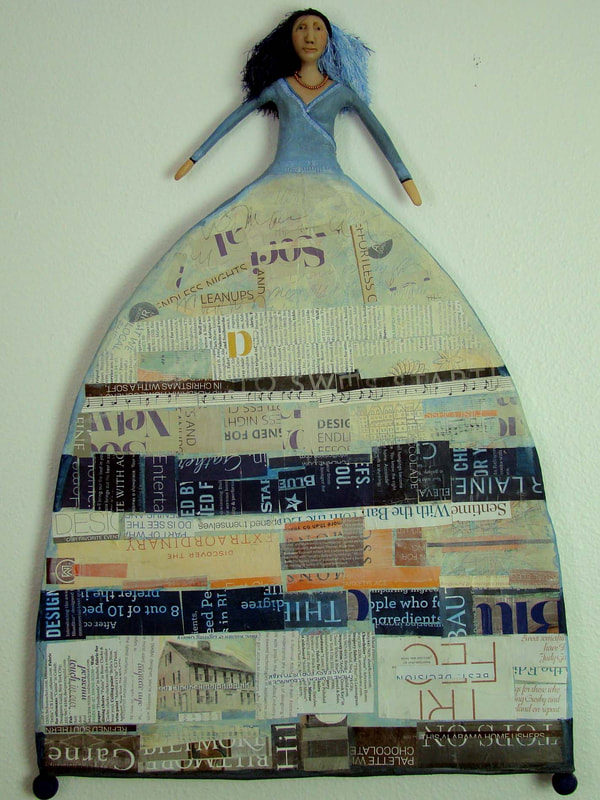
I participated in an open studio tour a few weeks before we left Santa Fe. My work was completely unknown in this community, so my expectations were low. I was pleased to display new paintings and also dug out all my remaining doll inventory from past years. The dolls looked good, better than I had remembered, and attracted quite a bit of attention. It was so rewarding for me to share them with customers. Quite a few dolls sold on this weekend and I was excited to think maybe my doll making adventures were not over. Following the open studio experience I decided to make some new Hoop Skirt dolls. This was one of my early doll ideas and I have created quite a few, but not several years. I kind of gave up after I developed a 100-step process to make one. Both new ideas are a variation on the Hoop Skirt Doll with a different twist on the idea of a "Story Teller'. One this piece I added a 3 children clinging to the skirt, climbing up to the main figure to hear the story. This doll features the collage quilted skirt as did the early version of this style. The skirt on this doll is made with many layers of paper collage on canvas in place of the quilted skirt. She is telling her story in a different way. There are bits of maps and music and lots of text. These clues suggest that she is a traveler and a musician, with so many conversations and ideas that most are only vaguely remembered. Will I make another hoop skirt doll?
This is my current problem. Yes, I want to make beautifully designed dolls that I love. But, I want a quick, trouble-free process that comes together smoothly. I want no wasted materials and no wasted time or energy. I don't really want to buy more supplies. And no more sticky fingers! Once in awhile a doll happens this way, but not very often! I have worked steadily at doll making for about 12 years, usually with energy and enthusiasm. You'd think things would be getting easier by now, but that doesn't seem to be the case. It is still a struggle. There are a variety of excuses for this. I've made all the easy stuff I can think of. I thinned out my collection of found objects and supplies. My collection of fabric scraps is depleted. I am out of practice. It is cold in the workshop. And, so forth. I need to get over it, and get busy! So, these are my doll making strategies for the rest of the year.
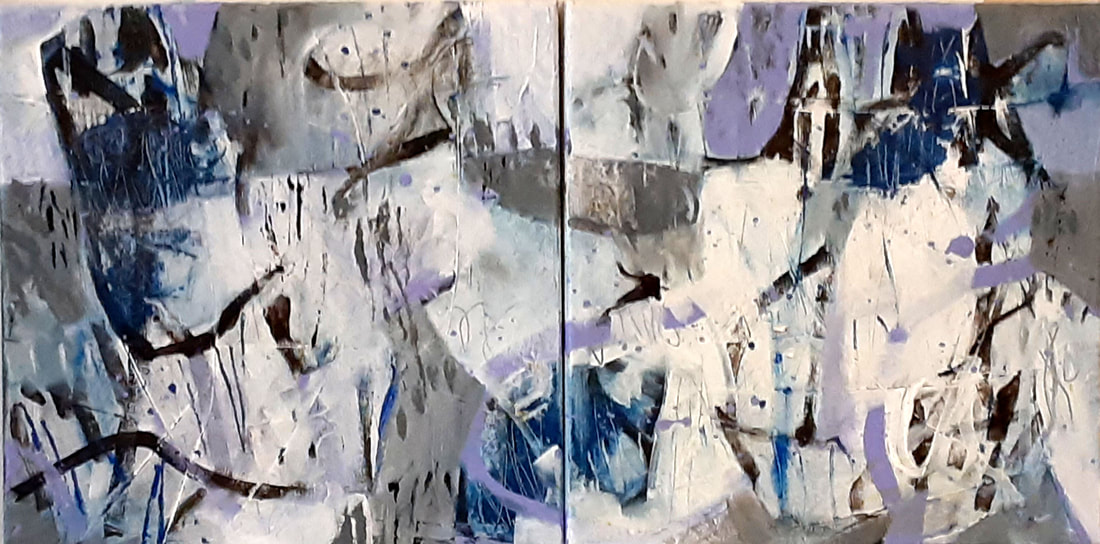
Yes, I'll make more dolls! The idea of creating a painting using the "conceal and reveal" process was introduced in an on-line painting class I've been taking. I quickly became intrigued with the process. The idea is to build up multiple layers of collage - just recklessly gluing down interesting papers of any kind - photos, color, textures, and type. This mess gets a coat or two of white paint to conceal everything. Finally, when the paint is dry the fun begins. I used an electric sander to seriously distress the surface. It was surprisingly hard to sand off very much white paint. Then I sprayed a little water in select areas and began to rub off some papers with my finger tips, revealing collage papers in lower areas. Cuts made into the surface with a case knife made it possible to peel off other bits and create straight lines. Interesting patterns and colors began to reveal themselves in combinations that I would never have thought of or been able to create. Bits of type and pattern in different levels of the original collage combined to make unexpected designs. I like the tiny details the best. In the final stages I made marks with my handmade smudge brush on the surface and glazed and glazed.
The question for me is this: Is this project just a distant memory, or a glimpse of future work? It might not be the whole future, but I plan to try this process again - several times. "A Distant Memory" is part of the members' show at the Spanish Peaks Art Council (SPACe) Gallery in La Veta, Colorado. The beginning of a new year is a good time to consider new opportunities and ideas. And, just a week into 2022 most of that feeling is still fresh. I am still at .500, and a winning season is a real possibility!
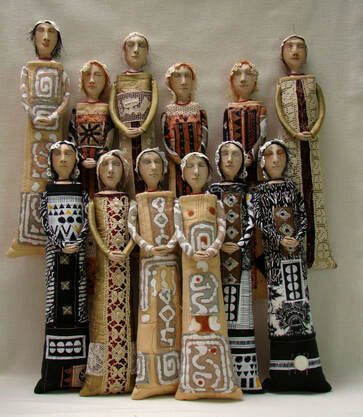
My husband and I said a fond farewell to New Mexico late in 2021, and moved to La Veta, Colorado. We loved living in Taos and Santa Fe, and exploring New Mexico, but Colorado is home! Needless to say that undertaking gobbled up months of my time and energy. I worked hard on making dolls and painting through most of last year, at least until the moving thing came up. The "Range Walker" idea got some new energy and I plan to make a few more this year. And, in a ground breaking development, I gave myself permission to THROW AWAY some old doll inventory and some unfinished doll projects. Time to move on! I hosted an Open Studio weekend in the final month before we moved. The results were interesting and encouraging in a way I didn't expect. I will share some of that in this blog before too long. I am developing a new work space in our La Veta house. It will be the largest studio space I've ever used. That in itself may bring some interesting changes in my thinking. In the meantime I have gathered all the important art making stuff in a spare bedroom and I have already started on some new work. My resolutions are simple: make dolls, try new art stuff and paint. Note that I did not announce how many great ideas are coming, as I foolishly did last year, or when anything would be finished! All of that will be revealed over time and as I publish this blog. I am planning to write on the second and fourth Saturday of each month. I know that a vlog, or reels, or maybe a You Tube channel would be more up to date, but I am going to try to do this for now. ! Coming up on January 22, I'll give a tour of my new studio space. This idea did work, but it took a long time, and I had my doubts at every step! I was so weary of the whole thing when I had finished that I had to set it aside for a few weeks! Why did I ever think it would be great to make 12 of these dolls? They came out for a photo session a few days ago and I want to share some details. My idea was to make 4 groups of 3 dolls, each doll with her eyes closed and head covered with a scrap of vintage lace. I wanted to explore neutral colors in pattern and texture, with a few pops of color. I wanted to make each figure complete in itself and a possible companion for any other of the 12. the dresses are fabric collage with some machine quilting as I have often used before. This time I added a bit of painting as needed, and a necklace, of course. Each doll is 13" tall and hangs on the wall. There is more variety than I expected in the faces. They began their journey from the same pattern and materials, but each one became herself before I was finished.
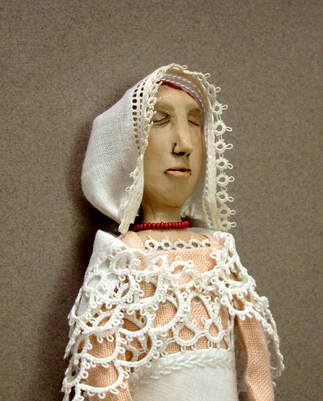
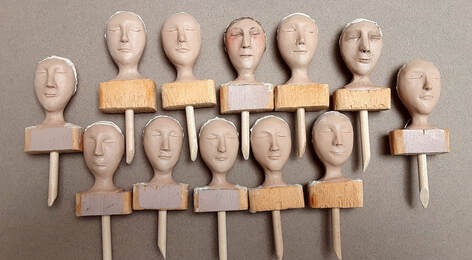
"The Idea Is Not The Work" is a statement that caught my attention in movie recently, The context was unrelated to art doll making, but it made me think. Maybe this is the mistake I've made all along. I've always figured that if I had an idea, then, ta-da, a doll was born. Failing to consider the work separate from the idea has led to frustrations and impatience. Here I will walk you through the process of developing the design of the "tube doll". I listed this as one of my art doll ideas for this year, but the idea spark happened last year, or the year before. I saw a wall installation in a gallery that was a series of ceramic cylinders. How cool would that be if each cylinder form had a head so that the piece looked like a group of people. I worked on this idea last year, eventually making "The Zipper Men". All of this makes it seem like I had already been working on this idea for a long time before I spent several more weeks on it this winter. So, I've got an idea. Now what? Experience has taught me lots of unsuccessful and tedious strategies, so I can avoid those now, I want a piece that will hang on the wall, either individually or in a group of 2 or 3 dolls. I want a polymer clay face and a fabric tube or cylinder that will represent a figure in a long dress or robe. I may try to figure out how to add arms. These will be 12 - 14" tall. The dolls pictured above are the first 2 experimental figures. I built up the head forms on 1/4" dowels using some aluminum foil and paper mache pulp. The polymer clay face needs support and it is much easier to model the clay against a firm surface. I like to use paper mache pulp to build up the back of the head. In this case I plan to paint it, but if I decide to add some fiber hair it will be possible to glue it on with water based glue. On the first doll, pictured on the left. I used a 1 1/2" diameter round wooden piece from the craft store for the shoulders, just slipping the dowel into the center. This was easy, but the round shape look awkward especially with the yarn glued in there and it didn't accommodate a hanger on the back. On the second doll, pictured on the right, I made the shoulder from a 1 1/2" long piece of 1x2, drilling a hole through the center and filing off the corners. This was better. I decided this would work best if the 1x2 was cut to a narrow 1/2" slice instead of the 1 1/2" piece. The dresses for these dolls were made from some quilted stuff on hand and I've come pretty close to working out the proportions of everything. I like the "tube" form flared a bit at the bottom and I'm beginning to work out the arms. These have a polymer bead made to look like clasped hands on a continuous wire running from shoulder to shoulder. These wire arms are wrapped with batting and fabric. OK. I decided I was ready to put all this to the test and make a special birthday gift for my mom, pictured below. A pale peach vintage linen napkin makes her dress. A pair of doilies, beautifully tatted and embroidered by my grandmother, are used for her shawl and apron. The lace on the handkerchief that makes her head covering is from the family stock of tatted things. Of course she has a necklace! I finally have 12 more heads almost ready to go. Each one still needs a little attention. These will make 4 groups of 3 dolls each. The linen and lace idea appeals to me and I would like to do one group in black and white. "Tube doll" is just a working name that doesn't make much sense at this point. I am now thinking of these as prayer or meditation dolls, but that is open to further developments.
I ordered a large roll of mixed media quality paper early in January. What a great way to start the year! The paper holds and absorbs the paint in a different way than canvas or board. That threw me a bit at first but continued experimentation is beginning to overcome the differences. The sheer volume of available paper (42" wide by 8 yards) is thrilling. So far, I've worked on smaller pieces because my work surface is limited. When the weather warms up a bit I can move to my painting to the garage where I have a larger table and more wall space. Marks and more marks! I have played around with as many mark making tools as I can find around the studio: sticks, skewers for dragging paint and scraping lines into the paint, Q tips, and more. I've has especially loved the graphite stick that has been kicking around with my stuff for 50 years. I'm trying to get the hang of painting with a brayer, too, but so far it doesn't seem to roll very well. It makes great marks, however. This piece uses 2 hand painted collage papers in black and white, that were later painted a bit, as well as some text torn from a magazine page. I am challenged by the simple act of painting a line with a brush. It never looks right to me. In piece below I used a transfer process of painting the line on a piece of plastic wrap and then flipping the wrap over to print it on the paper. What will I do with these paintings on paper? It almost doesn't matter. The exciting thing is that I am developing experience with color and composition and tools. There is lots of potential collage paper here, if nothing else. Most of these are 16" x 20", or at least 14" X 14", So, smaller pieces could be cropped out to be matted and framed, or mounted on a cradled board and finished.
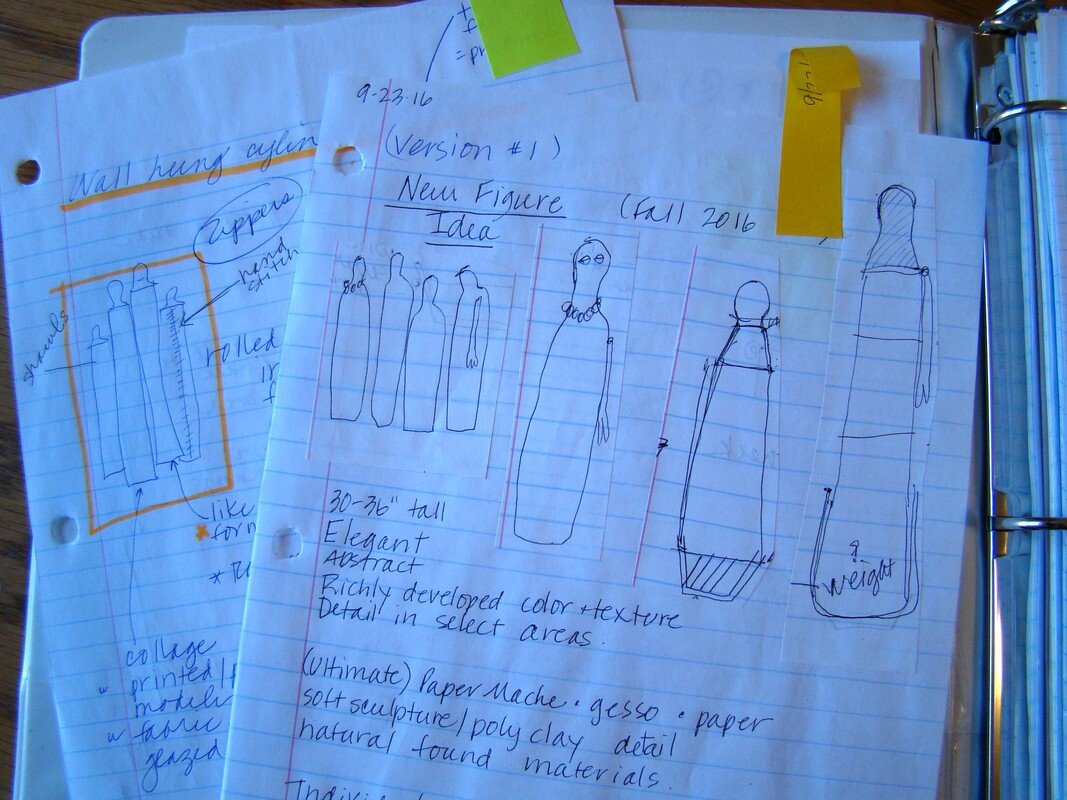
My system of making sketches and notes has always been pretty random. When I start to get an idea for a doll I just reach for scratch paper, the back of an envelope, or best case, a blank page in my notebook. The sketches usually are focused on how I plan to assemble a figure and materials I might use, without much other detail. These sketches are mixed in with grocery lists, and so forth. Once in awhile I gather them up and stick them into 3-ring binder. I pulled this notebook out recently to see what I could see, and to look for a few ideas. You can see my original sketch on the left that resulted in the "Zipper Men". It was fun to find some of the very early drawings for the "Hoop Skirt" doll that I eventually made many times. Many ideas have not been developed yet, and may never happen. I noticed several things as I browsed. Early dolls strongly featured machine quilted fabric collage. The expressive polymer clay faces never show up in the sketches, but are important in each piece. Fascination with construction and moving parts shows throughout. I tried to focus on what materials I would like to with now and how I would like to spend my time. I've gotten away from fabric collage and machine quilting in recent years, but I would like to do more now. I have many tiny scraps to use and I could hand paint some fabrics, too. Several boxes of antique linens, lace and baby clothes are still available. I love to make the little polymer clay faces and hope to find ways to use them that are not as labor intensive as making a full figure. I've been interested, too, in a more primitive, folk art style. This is a list of what I've figured out so far.
Some of these ideas are not entirely new, but there are 5 of them! In my blog posts over the next few months I plan to write about the development of each idea and show the results. The idea of painting had always been on the back burner for me until the past year. I was so intimidated by my university art courses that I headed for an art education degree. (As if facing a classroom of middle school kids would not be intimidating!) I hung onto my leftover paints and supplies for years, moving them with our household from here to there at least 20 times. Finally, in this pandemic year of being isolated at home I got underway with painting in a more serious way, and I think the light is beginning to dawn. I love that the physical activity and pace of the work is completely different than in my doll making. While some things, like the extensive fabric collage involved in my Hoop Skirt Dolls, seem to carry over a bit, there is much to learn. I have found some interesting on-line resources, and comments professors made long ago have come to mind, and finally made some sense. So, I plan to paint! Will I still make dolls? Of course. I was desperately tired of doll making when I turned to painting, but some of that new energy has bounced back into dolls ideas. As long as I can reasonably control the amount of time and detail involved, I can keep going. After all, I have a few new designs and a lovely supply of treasure to use!
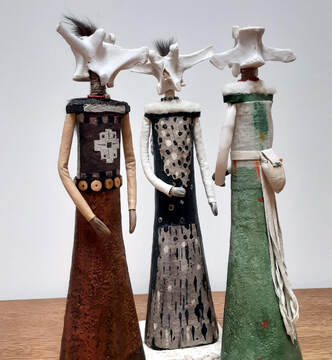
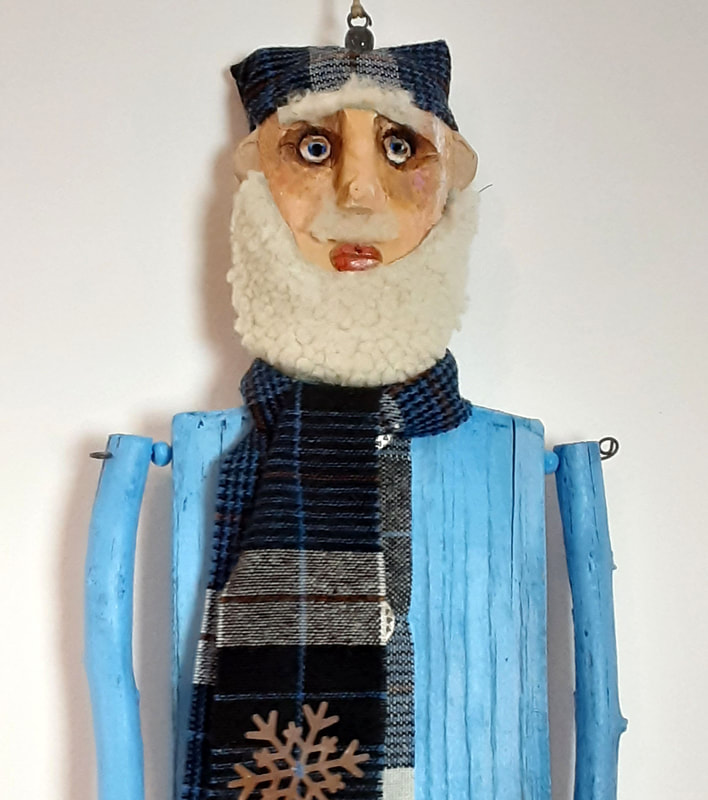
My BLOG plan is to to stay with the second and fourth Friday plan, writing about painting on the second Friday, about doll making on the fourth Friday. I plan to have a creative year! The little collection of Folk Art Santas that I have made over the years is very special and I enjoyed unpacking it and having it out on display this month. Over the holidays I saw a large, elaborate ceramic Santa figure. His blue and white color scheme interested me as much as anything, so I decided to translate that idea into a folk art style figure. Here is Blue Santa. 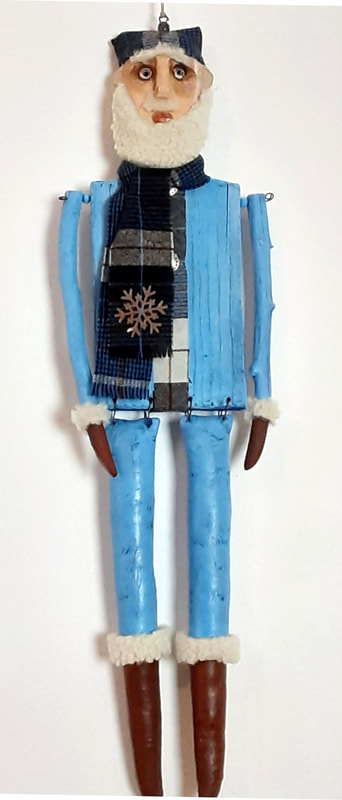 He came together quickly with weathered wood, sticks and a pair of legs I had originally made for someone else. It is so fun when something happens easily and it shows! This is not the case with the 3 ARTiculated dolls I have been working on this fall. I resolved to finish them before the end of the year and I almost made it. But, 2 of them did not make it through the final review this morning. Lumpy legs and an awkward skirt are among the problems. I don't like it when the struggle shows, so I will struggle a little more to try to make the results look like they were easily accomplished! I have some doll making ideas developing for 2021. Some glimmers you have seen here in my blog..
So, here we go into a happy new year. Let's get started!
|
Archives
March 2022
Categories |













 RSS Feed
